Canyon Topo's
In the Canyon
The two best ways of making notes during a descent are: writing in a waterproof notepad and filming whilst talking to the camera.
Writing notes may be worthwhile on a long descent as camera batteries will not last; filming, however, is more reliable, efficient, and produces more accurate topos as you can watch the footage repeatedly to make amendments and see features you may have missed if writing.
Before your descent,
Starting at either end, measure one metre of your canyoning rope.
Pick up the rope so you have the metre length between your hands.
Hold one end of the one metre length of rope with your arm outstretched to the side.
Whilst keeping the rope taut, measure the other end of the one metre length against your shoulder line (usually around your opposite shoulder bone).
Remember the location where the one metre length reached on your arm.
During your descent,
At the top of the drop, throw enough rope down until it touches the bottom.
Measure the rope by pulling up one metre lengths and keeping count as you go.
Alternatively,
Mark your rope with rope marker every one or two metres; be aware some inks may wash off. Then repeat the ‘during your descent’ process above.
After the canyon
There are three different styles of canyon topo; these include:
If you want to make a digital topo you will need a design program that can read vectors. Professional programs such as Adobe Illustrator and Affinity Designer are perfect for the job however you can make do with free software like Inkscape.
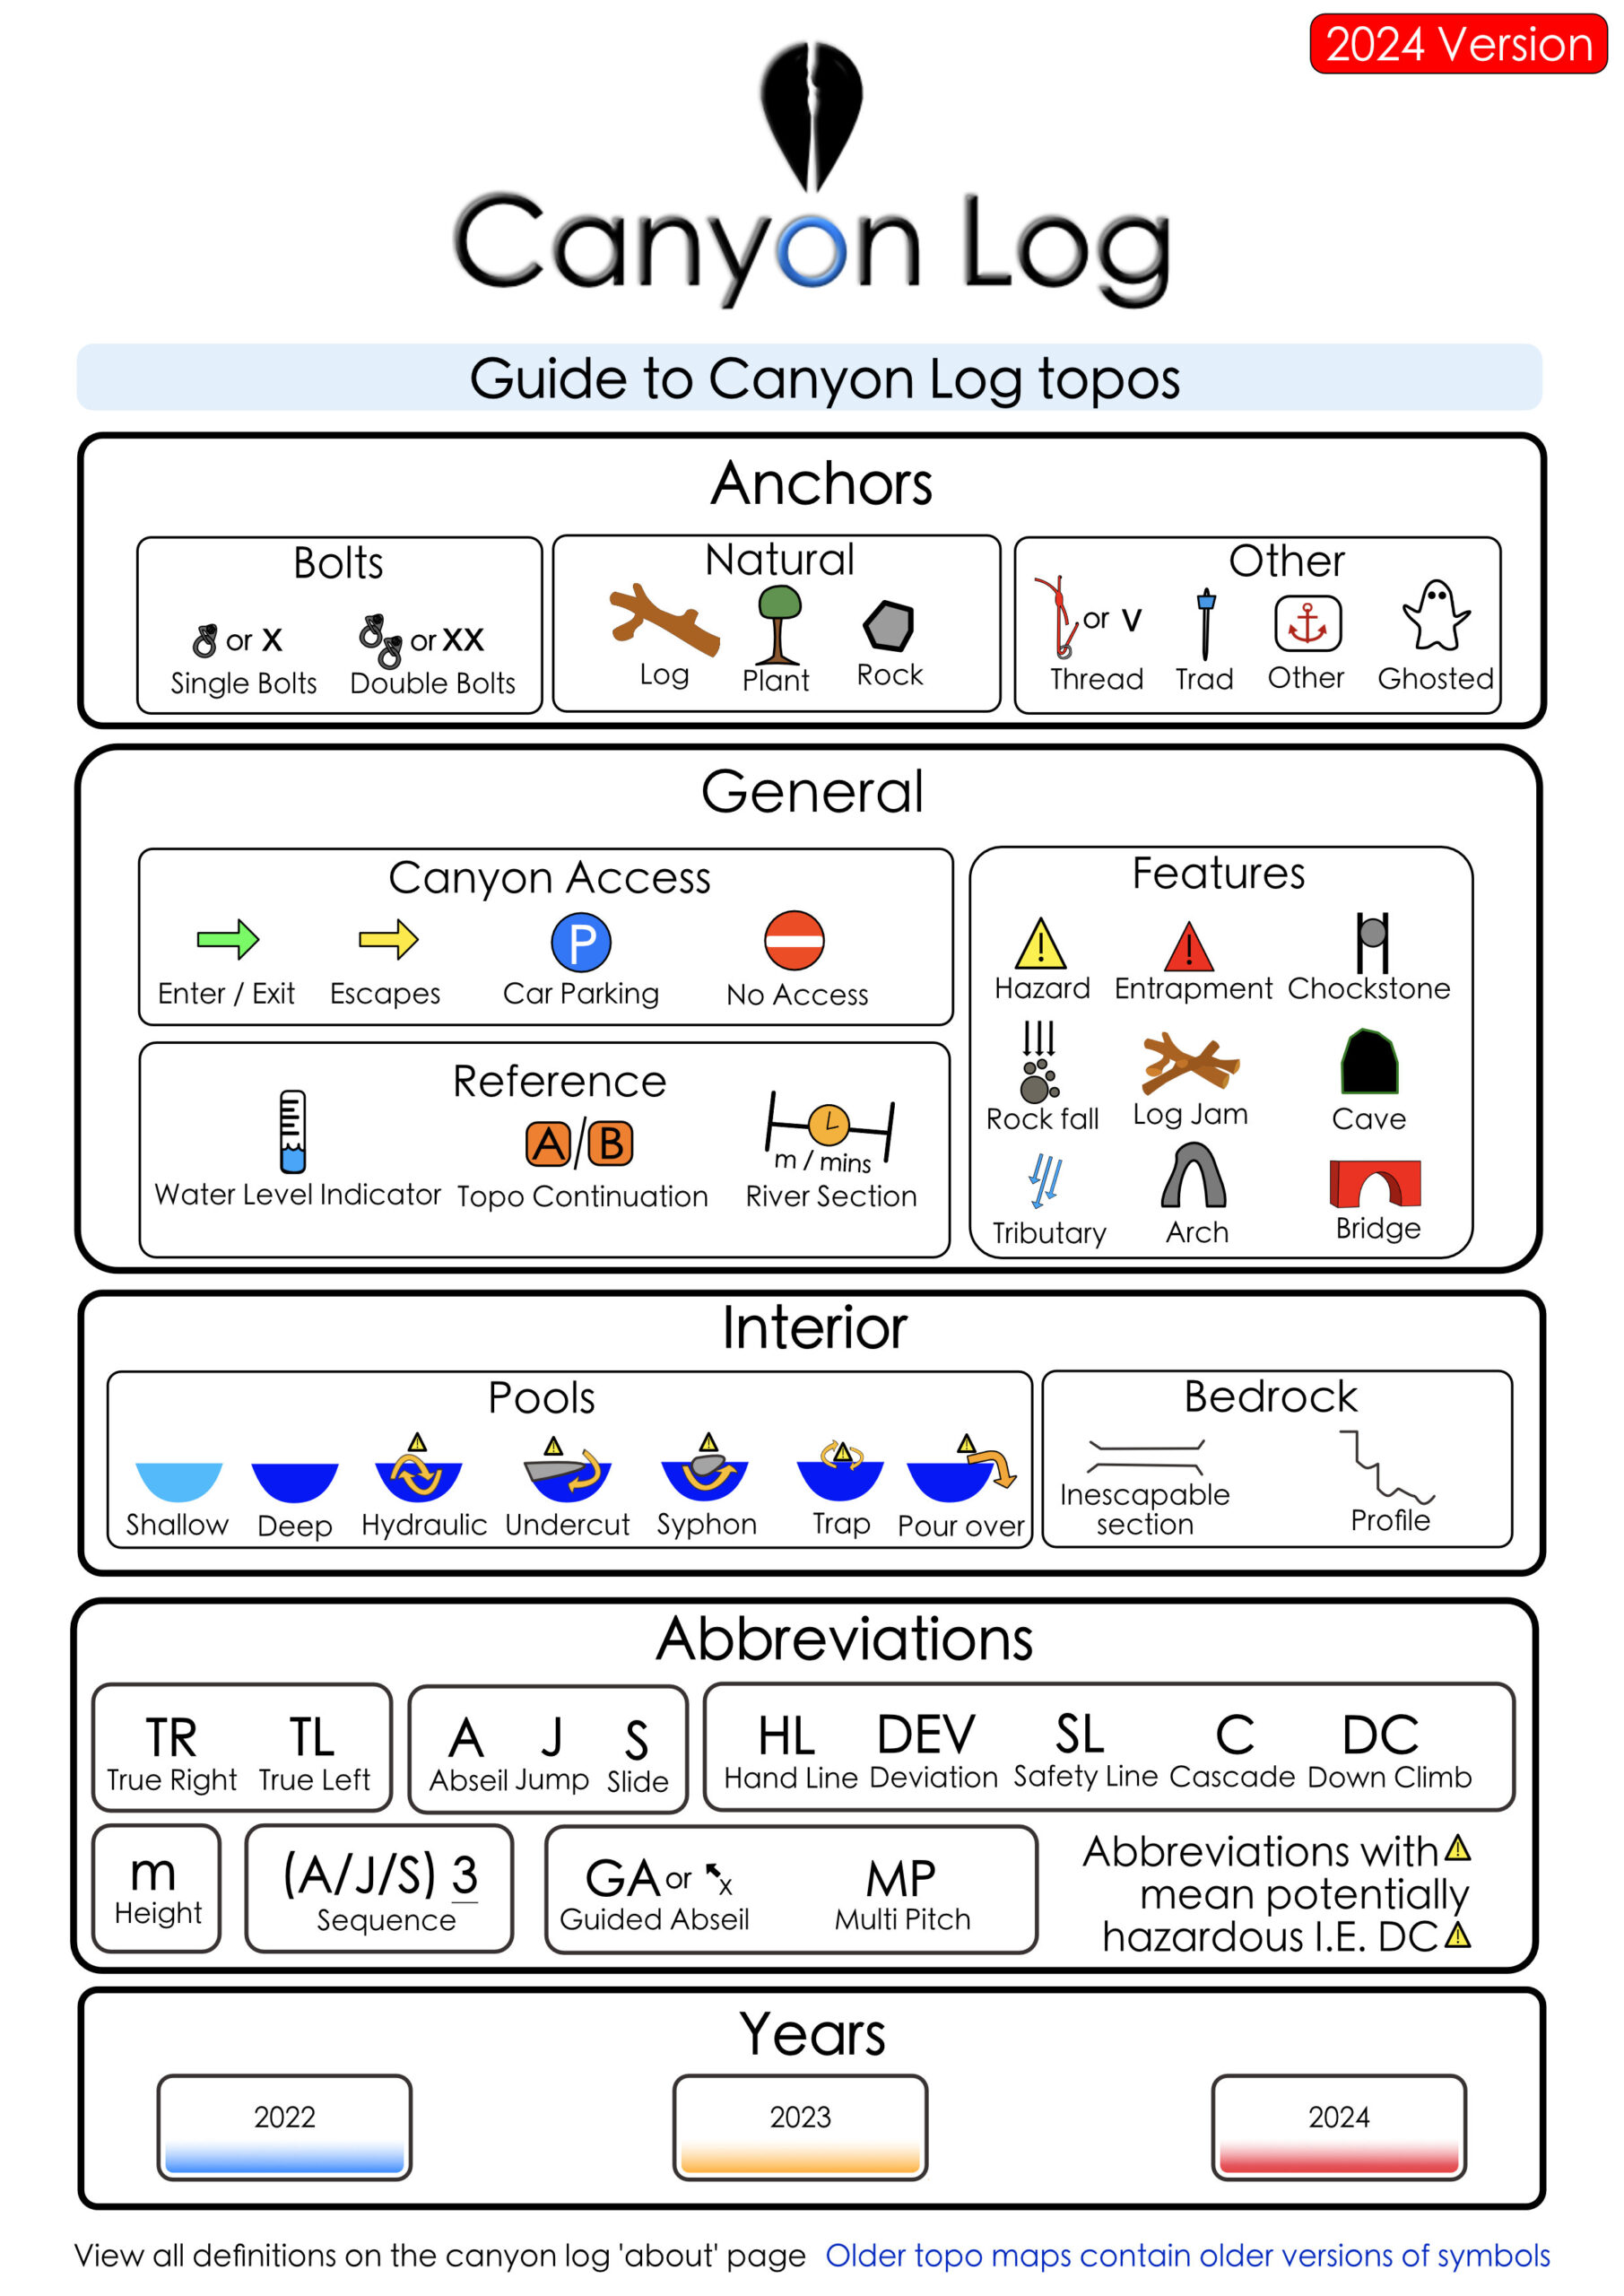
Once you have a design program, download the following four links to the Canyon Log; Definitions, Guide, Template and Vectors.
Make sure you read through the ‘Definitions’ document before starting.
- Open the template file in your selected design program.
- Change the name at the top of the page to the name of the canyon and add your name to the topo contributors at the bottom of the page.
- Next open the vector file and draw your topo based on the notes you made in the canyon.
- Copy the vectors you need and paste them into the template when you need them.
Once you are happy with it save the document as a SVG file, send it to us.
We might modify your topo!
To make sure all the canyon topos on Canyon Log are easy to understand and match up, we double-check your topo with our definitions. If we notice anything, we might make a small change to what you’ve sent us. And if we do make any changes, we’ll always check with you before we publish it.
Simply make notes of each element you come across as you descend the river, for example;
- Entry TL
- walk 100m
- A1 10m TR double bolt
- Shallow pool
- DC 3m
- A2 15m TL single bolt
- Deep pool
- escape TR
- A3 35m TL Natural anchor (sharp edges)
- deep pool
- (or 15m abseil then slide TR into A3 pool)
- down climb or jump 5m TR
- Exit at footbridge TL
Sending us your Topo


